Wiring Your Carbon Monoxide Detector: A Step-by-Step Guide
By B&M ElectricSeptember 4, 2025
Carbon monoxide detector wiring 2025: Essential Safety
Why Proper Carbon Monoxide Detector Wiring Saves Lives
Carbon monoxide detector wiring requires careful attention to safety protocols and electrical connections to protect your family from this silent killer. Here’s what you need to know:
Essential Wiring Steps:
- Turn off power at the circuit breaker before starting
- Connect three wires: black (hot), white (neutral), red/orange (interconnect)
- Test connections with a voltage tester before powering up
- Install backup battery for power outage protection
- Test the unit immediately after installation
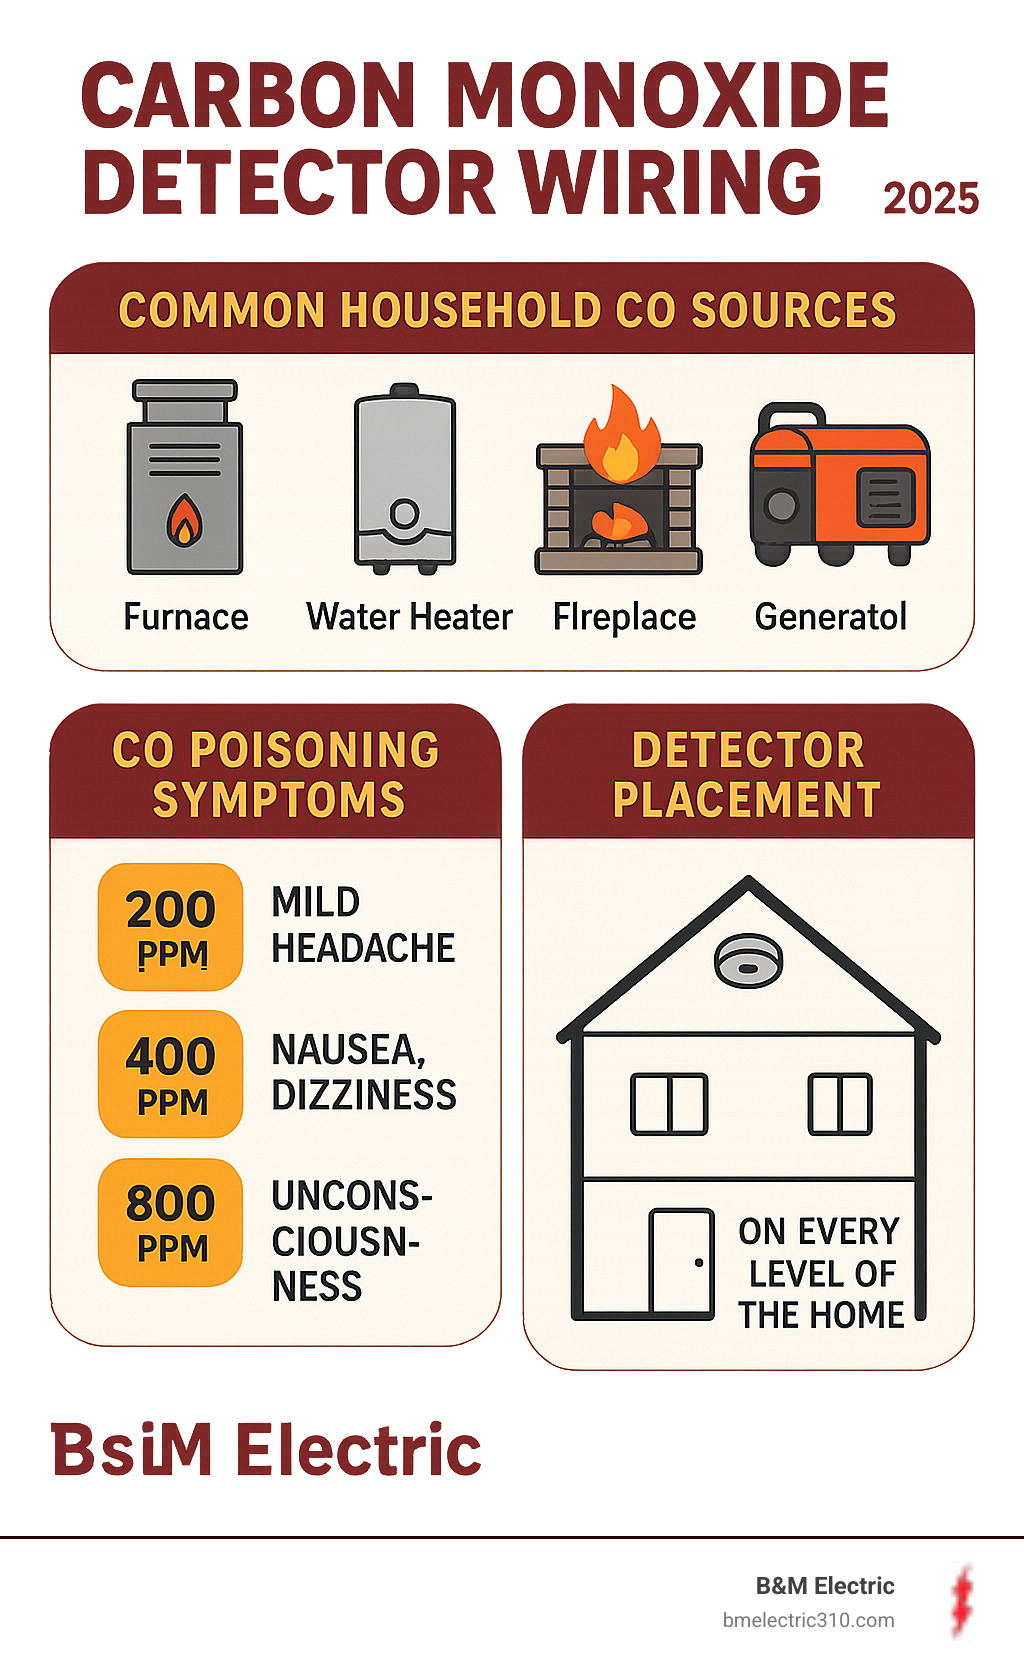
Carbon monoxide kills 430 people each year in the United States, according to the American Lung Association. This colorless, odorless gas comes from burning fossil fuels in your home – from furnaces and water heaters to fireplaces and generators.
Hardwired detectors offer critical advantages over battery-only units. They connect directly to your home’s electrical system with battery backup, ensuring continuous protection even during power outages. When interconnected properly, all alarms sound simultaneously if one detector senses danger.
Modern safety codes require both smoke and carbon monoxide detectors in homes. The wiring process is similar to smoke detectors but has important differences – especially regarding alarm panel integration and zone configuration.
While DIY installation is possible, electrical work carries serious risks. One wrong connection can leave your family unprotected or create fire hazards. Professional installation ensures proper wiring, code compliance, and peace of mind.
Choosing and Placing Your CO Detector for Maximum Safety
Getting the carbon monoxide detector wiring right starts with picking the right detector for your home. They’re similar to smoke alarms but have unique features vital for your family’s safety.
Carbon monoxide is an invisible, odorless gas from everyday appliances like your furnace, water heater, or fireplace. Modern building codes require CO detectors in most homes, especially if you have fuel-burning appliances or an attached garage.
Your local codes might have specific requirements, so it’s worth checking before you shop. For more on home safety, our guide on essential electrical safety tips covers the basics every homeowner should know.
Types of Carbon Monoxide Detectors
Not all CO detectors are created equal. Some plug into the wall, others run on batteries, and the premium models wire directly into your electrical system. Here’s what makes each type tick:
| Detector Type | Reliability | Maintenance | Features |
|---|---|---|---|
| Hardwired | Very High | Low (battery backup replacement) | Consistent power, often interconnected, can integrate with security systems |
| Battery-Powered | Moderate | High (frequent battery checks/replacement) | Easy installation, portable, no electrical connection needed |
| Plug-in | Moderate | Low (no battery replacement needed unless backup) | Simple to use, portable, limited by outlet availability |
Hardwired detectors are the gold standard for home protection. They tap directly into your electrical system, so you’ll never worry about dead batteries leaving your family vulnerable. Most include battery backup for power outages, ensuring continuous protection.
The real magic is interconnectivity. When one hardwired detector senses trouble, every connected alarm in your house sounds off simultaneously. Picture this: CO builds up in your basement while you’re sleeping upstairs. A hardwired system ensures that the basement alarm also triggers the bedroom detector, giving you precious extra seconds to react.
Battery-powered units win the simplicity contest. Mount them wherever you need protection – no electrical work required. The downside? They’re only as reliable as your memory for battery changes. Most need fresh batteries every six months, though some newer models use sealed lithium batteries that last up to 10 years.
Plug-in detectors split the difference nicely. They draw steady power from wall outlets but don’t require any wiring work. Just remember – you’re limited to spots near outlets, which might not always be the ideal detector location.
Combination smoke and CO alarms have become incredibly popular, and for good reason. Why install two separate devices when one unit can handle both jobs? These combo units simplify installation while providing comprehensive protection.
Smart detectors bring CO detection into the 21st century. They’ll ping your phone if danger strikes while you’re at work, and some even announce the specific threat in plain English instead of just beeping frantically.
Optimal Detector Placement
Location matters more than you might think. Carbon monoxide mixes with regular air pretty evenly, but strategic placement ensures your detectors catch problems before they become life-threatening emergencies.
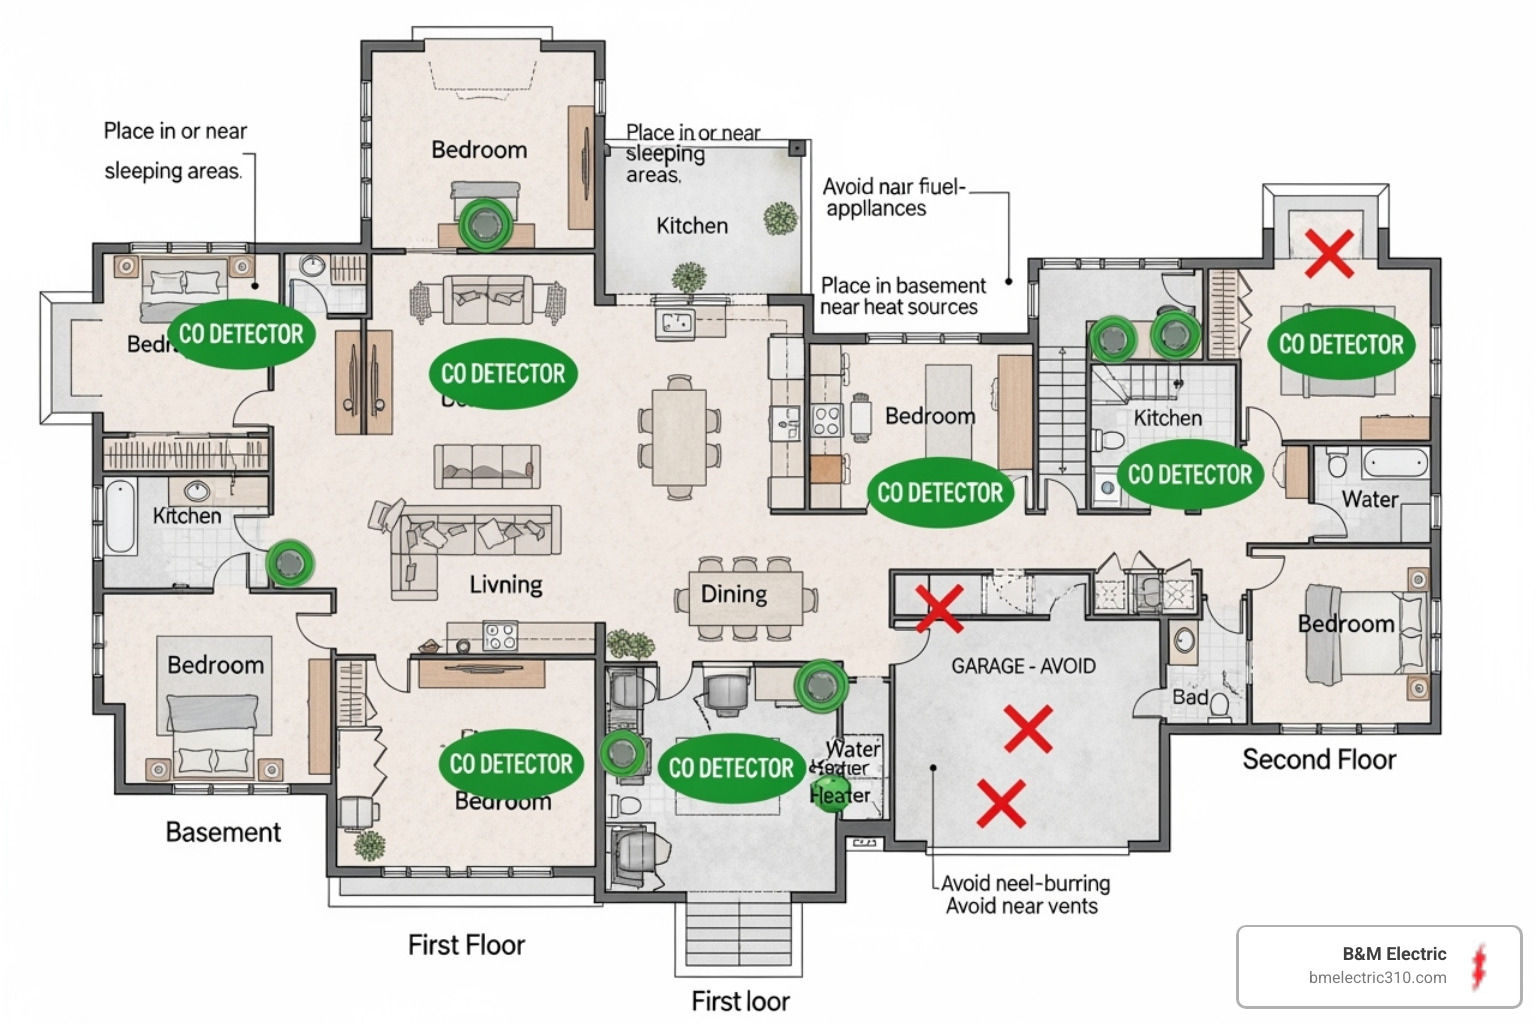
Every level needs protection – basement, main floor, and upstairs. Carbon monoxide travels through your home’s air circulation, so comprehensive coverage prevents any blind spots. Don’t forget that basement if you’ve got one – that’s often where furnaces and water heaters live.
Sleep areas deserve special attention. Install detectors within 10 feet of bedrooms, ideally in the hallway outside sleeping areas. You want those alarms loud enough to wake everyone up if CO levels spike during the night.
Wall versus ceiling mounting comes down to following manufacturer instructions. Most detectors work well on either surface, but check your specific model’s guidelines. Wall-mounted units typically go at least 5 feet up from the floor, while ceiling-mounted detectors should stay at least 1 foot away from walls.
Keep your distance from appliances – at least 15 feet from furnaces, stoves, and water heaters. These appliances produce small amounts of combustion byproducts during normal operation, which could trigger false alarms if your detector sits too close.
Avoid air circulation problems by steering clear of corners where walls meet ceilings. These “dead air” spots don’t get good airflow, which could delay detection when every second counts. Also avoid areas near windows, doors, or vents that might interfere with accurate readings.
Getting placement right sets you up for success when it comes time for installation and carbon monoxide detector wiring.
A Guide to Carbon Monoxide Detector Wiring
Now that you’ve chosen and placed your CO detectors, let’s dive into carbon monoxide detector wiring. This is more technical, but we’ll walk you through it step by step.
Working with electricity requires respect and caution. While many homeowners can handle basic detector wiring, there’s no shame in calling a professional if you feel uncertain at any point. One wrong connection could leave your family unprotected or create a fire hazard. For complex electrical work, including circuit breaker repairs in Palos Verdes, our experienced team is always ready to help.
Hardwired detectors offer significant advantages over battery-only units. They connect directly to your home’s electrical system with battery backup, ensuring continuous protection even during power outages. When wired together in an interconnected system, all alarms sound simultaneously if one detector senses danger – a feature that could save precious seconds in an emergency.
Tools and Safety First
Before you even think about touching a wire, let’s talk safety. Electrical work demands respect, and cutting corners isn’t worth the risk.
Essential tools you’ll need:
- Voltage tester (absolutely crucial for confirming power is off)
- Wire strippers for safely removing insulation
- Wire nuts to secure electrical connections
- Screwdriver set for mounting and terminals
- Ladder to safely reach ceiling or high wall locations
Turn off the power at your circuit breaker panel before starting any work. This isn’t optional – it’s literally a matter of life and death. Locate the breaker that controls the area where you’re working and flip it to “OFF.” Don’t rely on wall switches.
Verify the power is truly off using your voltage tester. This little device could save your life. Touch it to the black wire, then the white wire, then any other wires you encounter. No reading means you’re safe to proceed.
Let others in your home know you’re working on the electrical system. Consider taping a note to the breaker panel so nobody accidentally flips the power back on while you’re working.
Step-by-Step Hardwired Carbon Monoxide Detector Wiring
Ready to get your hands dirty? Carbon monoxide detector wiring follows a standard pattern, but attention to detail is crucial for safety and proper operation.
Start by removing any old unit if you’re doing a replacement. Twist it counter-clockwise to remove it from the mounting base, then disconnect the wiring harness. Pro tip: take a photo of the existing connections before disconnecting anything. You’ll thank yourself later.
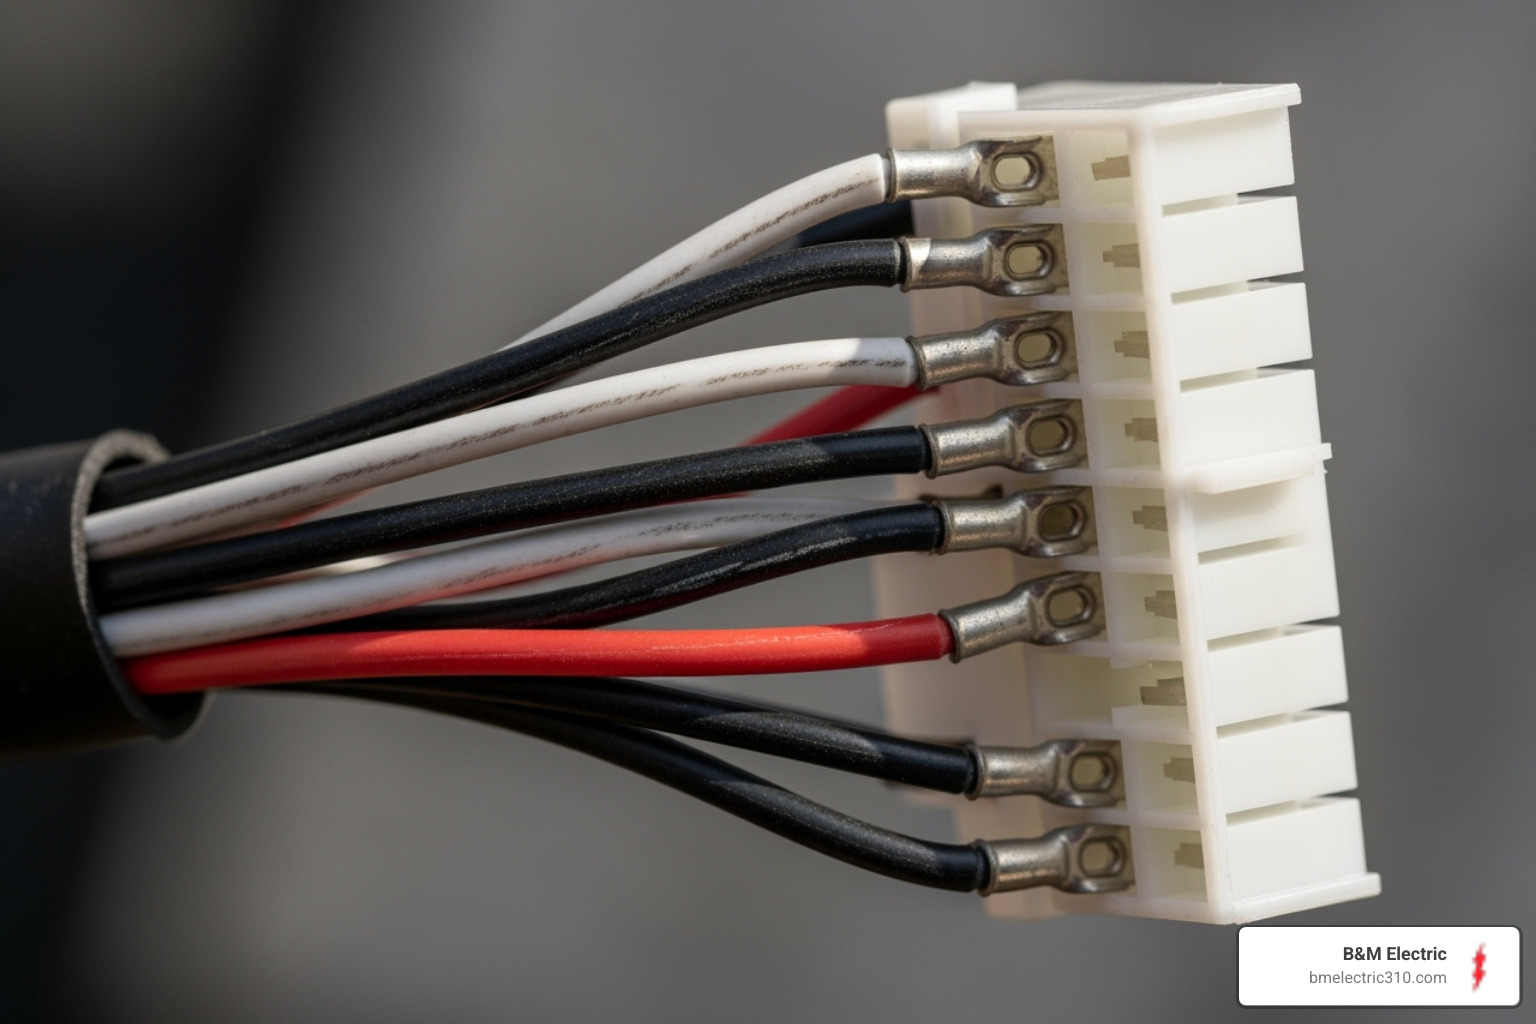
Prepare the wiring harness that comes with your new detector. You’ll see three color-coded wires that tell a simple story. The black wire is your “hot” wire – it brings power from your electrical panel. The white wire is neutral, completing the electrical circuit. The red or orange wire is special – it’s the interconnect wire that lets multiple detectors talk to each other.
Connect the wires carefully by matching colors. Strip about 3/8 inch of insulation from each wire end, twist the matching wires together, and secure them with wire nuts. Black to black for your power connection. White to white for neutral. Red or orange to red or orange if you have an interconnected system (if not, just cap off the interconnect wire with a wire nut).
Mount the base plate securely to your electrical box or ceiling. Make sure it’s firmly attached – this is what holds your detector in place. Gently tuck the wire connections back into the electrical box.
Install the backup battery in your detector unit. Even hardwired units need battery backup for power outages. Most use a standard 9-volt battery or AA batteries.
Attach the detector by plugging the wiring harness into the back of the unit, then twisting it clockwise onto the base plate until it locks securely.
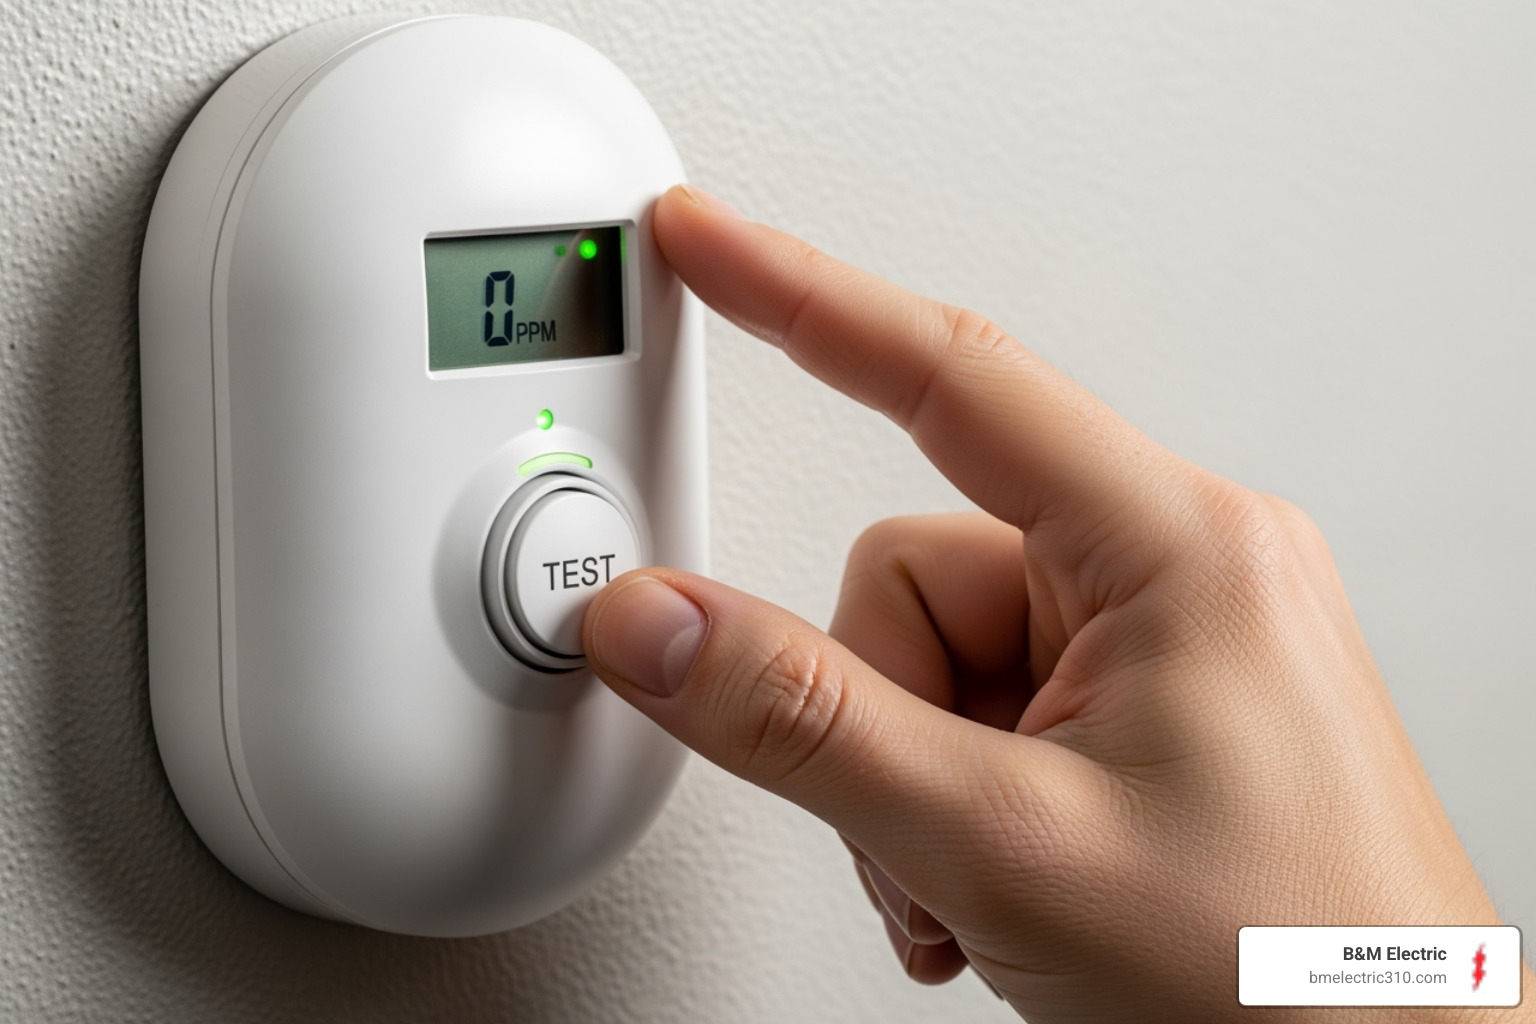
Power up and test immediately. Flip your circuit breaker back on and listen for the detector’s startup chirp. Press and hold the test button – you should hear a loud, clear alarm. If not, double-check your connections.
Understanding Advanced Wiring: Interconnected and System-Integrated Detectors
Some installations go beyond basic single-detector setups, and understanding these advanced options can significantly improve your home’s safety.
Interconnected systems use that red or orange wire to create a network of detectors throughout your home. When one detector senses CO, it sends a signal through the interconnect wire, triggering every connected alarm simultaneously. This “daisy-chaining” ensures everyone in the house hears the warning, no matter where the danger originates.
Four-wire detectors take things to the next level, especially when integrating with security systems or fire alarm panels. Unlike standard three-wire units, these detectors have separate terminals for power and alarm signals, allowing more sophisticated monitoring.
Security system integration requires special attention to zone configuration. Here’s something important: CO detectors cannot share zones with fire detectors or other devices. They need their own dedicated “non-fire zone” on your alarm panel. This ensures that CO alarms trigger the appropriate emergency response and don’t get confused with fire alarms.
Trouble relays in advanced detectors monitor the unit’s health, sending signals when there’s a problem like sensor failure or end-of-life conditions. This feature ensures your security company knows immediately if a detector needs attention, even when it’s not actively alarming.
These advanced features require careful planning and often benefit from professional installation to ensure proper integration and code compliance.
After Installation: Testing, Maintenance, and Emergency Response
Congratulations! You’ve successfully installed your carbon monoxide detector wiring and taken a major step toward protecting your family. But installation is just the beginning. Your CO detector needs regular care and attention to keep doing its job effectively.
Just like you wouldn’t ignore your smoke detector’s monthly chirping reminder, your carbon monoxide detector deserves the same level of attention. The good news? Maintaining these life-saving devices is pretty straightforward once you know what to look for. For more insights into keeping your home’s electrical systems running smoothly, check out our guide on essential electrical maintenance.
Regular Testing and Maintenance
Your CO detector works around the clock, silently monitoring the air in your home. The least we can do is give it a quick check-up now and then to make sure it’s still on the job.
Monthly testing should become as routine as checking your mailbox. Simply press and hold that test button for a few seconds. You should hear a loud, unmistakable alarm sound that’ll probably make you jump a little – that’s exactly what you want! If the alarm doesn’t sound, don’t panic, but do investigate. Check the battery connections and wiring, and if problems persist, it might be time for a replacement.
Even though your hardwired detector draws power from your home’s electrical system, that backup battery is your safety net during power outages. Most units use standard 9-volt batteries that should be replaced every six months. Here’s a helpful trick: change them when you spring forward or fall back with daylight saving time. It’s an easy way to remember! Some newer detectors come with sealed 10-year lithium batteries, which means less maintenance but the same monthly testing routine.
Cleaning your detectors might not be the most exciting household chore, but it’s important. Dust and debris can clog the sensor ports, making your detector less effective. A gentle vacuuming or light dusting once a year does the trick. Just avoid using any cleaning products, polish, or paint near the unit – these can damage the sensitive sensors inside.
Here’s something many homeowners don’t realize: CO detectors don’t last forever. The sensors inside gradually lose their sensitivity over time, typically after five to ten years depending on the model. Most modern detectors are smart enough to let you know when they’re getting tired – they’ll emit an “end-of-life” chirp that’s different from a low battery warning. When you hear that signal, it’s time to retire your old detector and install a fresh one.
What Do the Alarms and Readings Mean?
When your CO detector starts making noise, it’s trying to tell you something important. Learning to “speak detector” can help you respond appropriately and avoid unnecessary panic.
The most critical sound you need to recognize is the CO alarm pattern. Most detectors use what’s called a “temporal-four” pattern – four quick beeps followed by a five-second pause, then repeat. This pattern is intentionally different from smoke alarms, which typically use three beeps. The alarm is designed to be loud enough (about 85 decibels) to wake you from a deep sleep.
Those occasional single chirps usually mean something different entirely. If your detector chirps once every 15, 30, or 60 seconds and it’s not a low battery issue, your detector is probably telling you it’s reached retirement age. This end-of-life chirp is actually a safety feature – the detector knows its sensors aren’t as sharp as they used to be.
Many modern detectors feature digital displays that show real-time carbon monoxide levels in parts per million (PPM). Understanding these numbers can be helpful: levels below 50 PPM are generally considered safe for healthy adults, though the detector typically won’t alarm. Moderate levels between 50-100 PPM might trigger an alarm after one to two hours of sustained exposure. High levels over 100 PPM should cause your detector to sound within 10-40 minutes, while extremely dangerous levels over 400 PPM will trigger immediate alarms.
For detailed information about CO poisoning symptoms at different exposure levels, the CDC provides excellent resources at their carbon monoxide information page.
What to Do If Your CO Alarm Sounds
This is where all your preparation pays off. When that alarm sounds, you’re not dealing with a false alarm or a minor inconvenience – you’re facing a potentially life-threatening situation that demands immediate action.
Get everyone out immediately. Don’t stop to investigate, don’t try to find the source, and don’t grab your belongings. Carbon monoxide is invisible and odorless, so you can’t detect it without your detector. Trust your device and move to fresh air as quickly as possible.
Once everyone is safely outside, call 911 from a safe location. Tell them your carbon monoxide alarm is sounding. Emergency responders have specialized equipment to measure CO levels and determine what’s causing the problem. They’ll also know how to safely ventilate your home and check all your fuel-burning appliances.
Account for everyone who was in the house, including pets if possible. Carbon monoxide affects everyone, and symptoms can include headache, dizziness, nausea, confusion, or chest pain. If anyone is experiencing these symptoms, mention it to the emergency responders – they may recommend immediate medical attention.
Here’s the hardest part: don’t go back inside until emergency responders give you the all-clear. We know it’s tempting to grab a phone charger or check on things, but CO can reach deadly levels quickly. Professional responders have the training and equipment to safely enter your home and identify the problem.
A sounding CO alarm isn’t a drill or a malfunction – it’s your detector doing exactly what it was designed to do. Trust it, act quickly, and let the professionals handle the investigation. Your life is worth more than any inconvenience.
Frequently Asked Questions about Carbon Monoxide Detector Wiring
We know that carbon monoxide detector wiring can feel overwhelming. Over our 50 years serving the South Bay, we’ve heard just about every question. Here are the most common ones, with straightforward answers.
What’s the difference between wiring a CO detector and a smoke detector?
Here’s the good news: for most homeowners, carbon monoxide detector wiring looks almost identical to smoke detector wiring. Both typically use the same three-wire setup – your black wire for power, white wire for neutral, and red or orange wire for interconnection. This means they can share the same electrical circuits and communicate with each other when alarms sound.
But there are some important differences lurking beneath the surface. 4-wire systems become necessary when you’re connecting to security panels, particularly for CO detectors like the System Sensor models. These systems require separate connections for alarm signals and trouble alerts.
The sensor technology is completely different too. While smoke detectors use ionization or photoelectric sensors to spot smoke particles, CO detectors rely on electrochemical sensors specifically tuned to detect carbon monoxide gas. It’s like having two different specialists on your safety team.
Alarm sound patterns help you tell them apart in an emergency. CO detectors use a distinctive “temporal-four” pattern – four quick beeps, pause, repeat. Smoke alarms typically use three beeps instead. Your brain will thank you for this difference when you’re trying to figure out what’s happening at 3 AM.
Perhaps most critically, when connecting to security systems, CO detectors must be wired to dedicated non-fire zones. This isn’t just a technicality – it ensures that when your CO detector triggers, emergency responders know they’re dealing with a gas leak, not a fire. This separation can literally save lives by ensuring the right response.
Can I replace a hardwired smoke detector with a combination smoke/CO unit?
Absolutely! This is one of our favorite upgrades to recommend. Replacing a hardwired smoke detector with a combo unit is usually straightforward and gives you double the protection in the same space.
Most combination units are designed to work with existing 3-wire smoke detector setups. You’ll follow the same basic process – turn off the power, match your wire colors (black to black, white to white, red to red), and mount the new unit. The wiring compatibility makes this upgrade surprisingly simple.
The safety improvement is substantial. Instead of having gaps in your CO coverage, you’re adding this critical protection wherever you already have smoke detection. For detailed step-by-step instructions, check out this helpful guide on How to Replace Your Hardwired Smoke Detector with a Combo Smoke and CO Detector.
This upgrade is particularly smart if you’re already planning to replace aging smoke detectors. Why not get both types of protection while you’re at it?
Why does my hardwired detector need a battery?
This question makes perfect sense – if it’s hardwired, shouldn’t it just work off house power? The backup battery is your safety net when the power goes out, and trust us, you want that net.
Power outages don’t stop carbon monoxide leaks. In fact, they might make them more likely if people start using generators, camp stoves, or other backup heating sources improperly. Your hardwired detector draws its main power from your electrical system, but that battery ensures uninterrupted protection when the lights go out.
Code requirements typically mandate this backup power for good reason. Safety officials know that emergencies don’t wait for convenient times. Whether it’s a storm knocking out power lines or a tripped breaker, your CO detector needs to stay awake and alert.
Think of it this way – your smoke detector and CO detector are like security guards for your home. You wouldn’t want your security guard to take a break just because the building’s main power went out. That little 9-volt battery keeps your guard on duty 24/7, no matter what’s happening with your electrical system.
The battery backup transforms your hardwired detector from a fair-weather friend into an all-weather protector. And honestly, for something this important to your family’s safety, redundancy isn’t just smart – it’s essential.
Conclusion: Ensure Your Home’s Safety with Professional Installation
Carbon monoxide detector wiring might seem straightforward, but there’s a world of difference between understanding the process and executing it safely. This guide walked through choosing the right detector and understanding the crucial interconnect wires that make your system work together.
The reality is that electrical work carries serious risks. One loose connection, a mismatched wire, or skipping a safety step can turn your protective device into a potential hazard. Even worse, improper installation might leave your family completely unprotected from carbon monoxide poisoning – defeating the entire purpose of having a detector in the first place.
Professional installation ensures your peace of mind. When you work with experienced electricians, you’re not just paying for the installation – you’re investing in expertise that guarantees your system works exactly as designed. Proper carbon monoxide detector wiring involves understanding local codes, ensuring correct zone configurations for security systems, and testing every connection thoroughly.
At B&M Electric, we’ve been protecting South Bay families for over 50 years. Our licensed electricians understand that your family’s safety isn’t something to gamble with. We handle the complexities of interconnected systems, steer the requirements for non-fire zones in security panels, and ensure every wire connection meets or exceeds safety standards.
We make electrical work worry-free. While DIY projects can be rewarding, electrical safety isn’t the place to learn through trial and error. Our team brings precision and care to every installation, plus that personal touch that makes the entire experience enjoyable rather than stressful.
Don’t leave something this important to chance. Your carbon monoxide detectors are your family’s silent guardians – they deserve to be installed right the first time. For professional installation and contact us for professional electrical repairs in Torrance, CA, we’re here to help you create a safer home with complete confidence.


