Wiring Wonders: Installing GFCI, USB, and Smart Outlets Made Easy
By B&M Electric September 11, 2025
GFCI outlet install: Ultimate Safe DIY 2025
Why GFCI Outlets Are Critical for Modern Home Safety
GFCI outlet install projects protect your family from deadly electrical shocks and prevent house fires. Here’s what you need to know:
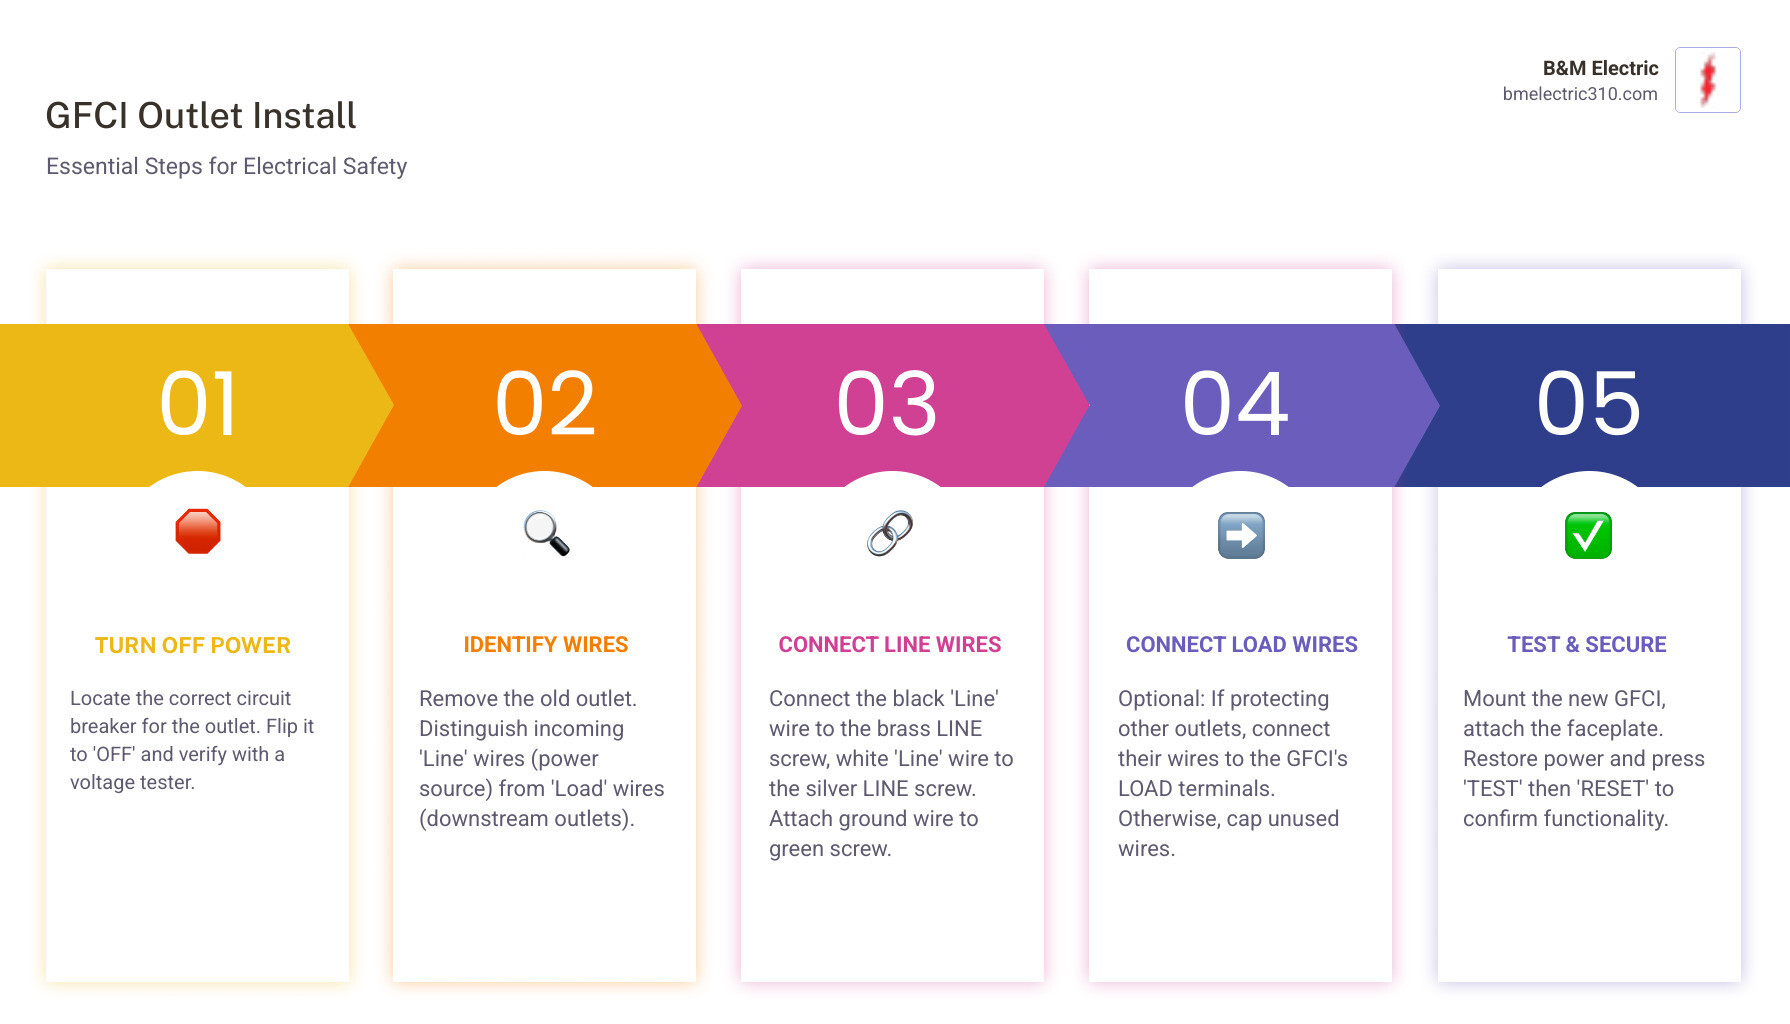
Quick GFCI Installation Overview:
- Turn off power at the circuit breaker and verify with a voltage tester
- Remove old outlet and identify line wires (from power source) vs load wires (to other outlets)
- Connect line wires to LINE terminals: black to brass, white to silver
- Connect ground wire to green screw
- Connect load wires to LOAD terminals if protecting downstream outlets
- Test the outlet using TEST and RESET buttons
Ground Fault Circuit Interrupter outlets detect when electricity takes an unintended path – like through water or a person’s body. They shut off power in milliseconds to prevent serious injury or death.
The National Electrical Code requires GFCI protection in all wet or damp locations. This includes kitchens, bathrooms, laundry rooms, garages, unfinished basements, and outdoor areas. If your home’s electrical system hasn’t been upgraded in the past 20 years, you likely need GFCI outlets installed.
Modern outlet upgrades go beyond just safety. USB outlets eliminate the need for bulky charging adapters, while smart outlets let you control devices remotely and monitor energy usage from your phone.
Understanding Your Outlet Upgrade
When you’re planning a GFCI outlet install, you’re making a smart investment in your home’s safety and convenience. Let’s break down what these modern outlets can do for you.
A Ground Fault Circuit Interrupter (GFCI) outlet is a sophisticated safety device. It constantly monitors electrical current and, if it detects an imbalance—such as electricity flowing through water or a person—it shuts off power in a fraction of a second. This rapid response, identifiable by the “Test” and “Reset” buttons, prevents life-threatening shocks and can stop electrical fires before they start. For more on how they work, see What is a GFCI?. To learn more about home electrical safety, read our Essential Electrical Safety Tips guide.
Why GFCI Outlets Are a Non-Negotiable for Home Safety
The National Electrical Code (NEC) mandates GFCI outlets in areas where electricity and water could mix. This includes kitchens (especially near sinks), all bathroom outlets, laundry rooms, garages, unfinished basements, crawl spaces, and all outdoor receptacles. If your home’s electrical system is over 20 years old, it likely needs a GFCI outlet install to meet current safety standards and protect your family. Our guide on Upgrading to GFCI Outlets provides more detail on what your home needs.
A Quick Look at USB and Smart Outlets
While GFCIs handle safety, other upgrades add modern convenience.
USB outlets offer a streamlined way to charge devices by letting you plug them directly into the wall, freeing up standard outlets from bulky adapters.
Smart outlets bring home automation to the next level. Connected to your WiFi, they allow you to control plugged-in devices remotely via your smartphone, set schedules, and even monitor energy usage. Combining GFCI safety with the convenience of USB and smart outlets creates a modern, secure, and functional home.
Preparing for a Safe and Successful Installation
Proper preparation is the key to a safe and successful GFCI outlet install. Electricity doesn’t forgive mistakes, but following these steps will help you tackle the project with confidence.
Essential Safety Precautions Before You Begin
These steps are not suggestions; they are essential for any electrical work.
- Turn Off Power: Locate your electrical panel and turn off the correct circuit breaker. If unsure, turn off the main breaker.
- Verify Power is Off: Use a non-contact voltage tester on the outlet to confirm the circuit is dead. Test your tester on a live circuit first to ensure it’s working.
- Use Proper Lighting: A headlamp or work light is crucial for seeing wires clearly in a dark electrical box.
- Keep the Area Dry: Ensure your hands, tools, and workspace are completely dry. Water and electricity are a deadly mix.
- Use Lockout/Tagout: Place tape over the breaker switch with a note to prevent someone from turning it back on. Inform everyone in the house that you are doing electrical work.
If you feel unsure at any point, stop and call a professional. Our article on Electrical Repairs for a Safe Home offers more safety guidance.
Tools and Materials You’ll Need
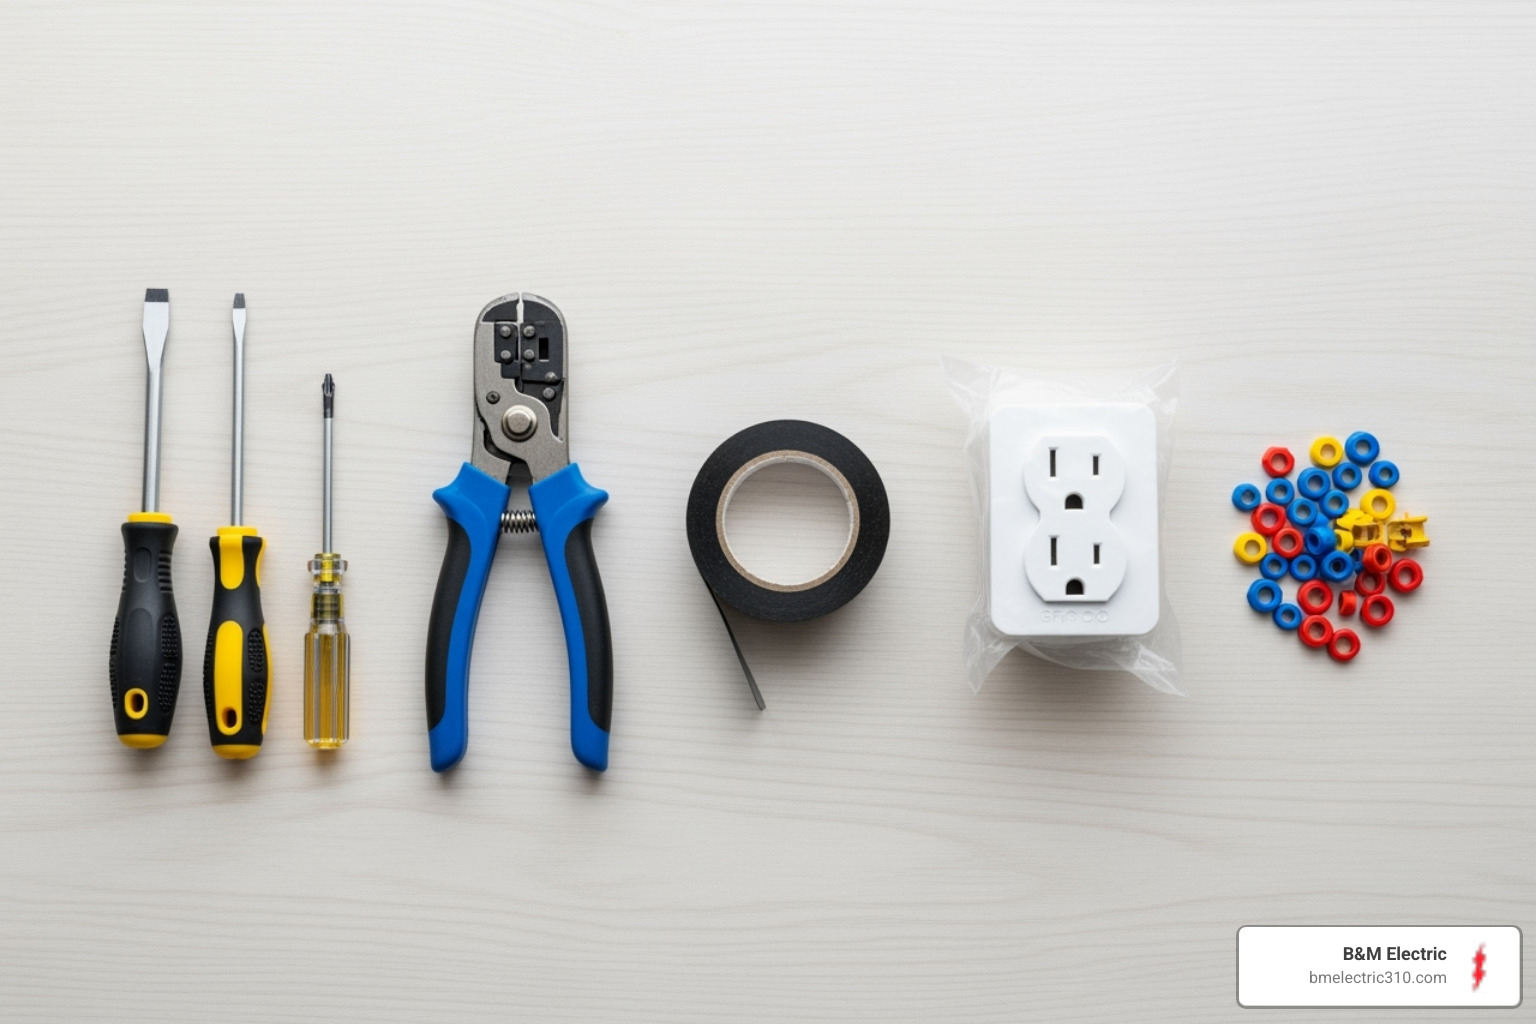
Having the right tools makes the job smoother and safer. For your GFCI outlet install, you’ll need:
- New GFCI Receptacle: Match the amperage (15 or 20 amps) to your circuit. Use a Weather Resistant (WR) model for outdoor locations.
- Screwdriver Set: Phillips and flathead screwdrivers.
- Wire Strippers: To remove insulation without damaging the copper wire.
- Needle-Nose Pliers: For bending wire ends into hooks for terminal screws.
- Voltage Tester: A non-contact tester is essential for safety checks.
- Electrical Tape: For labeling wires and covering unused terminals.
- Smartphone: To take photos of the existing wiring before you disconnect anything.
- Work Light or Headlamp: For clear visibility.
Your Step-by-Step Guide to GFCI Outlet Install
This guide will walk you through each connection to ensure your GFCI outlet install is done correctly and safely.
Step 1: Removing the Old Outlet and Identifying Wires
With the power off and verified, remove the wall plate. Unscrew the old outlet from the electrical box and gently pull it out. You’ll see a hot wire (usually black), a neutral wire (white), and a ground wire (bare copper or green). Before disconnecting anything, take a photo of the wiring setup. Then, loosen the terminal screws to disconnect the wires.
Step 2: A Crucial Step in Your GFCI Outlet Install: Line vs. Load Wires
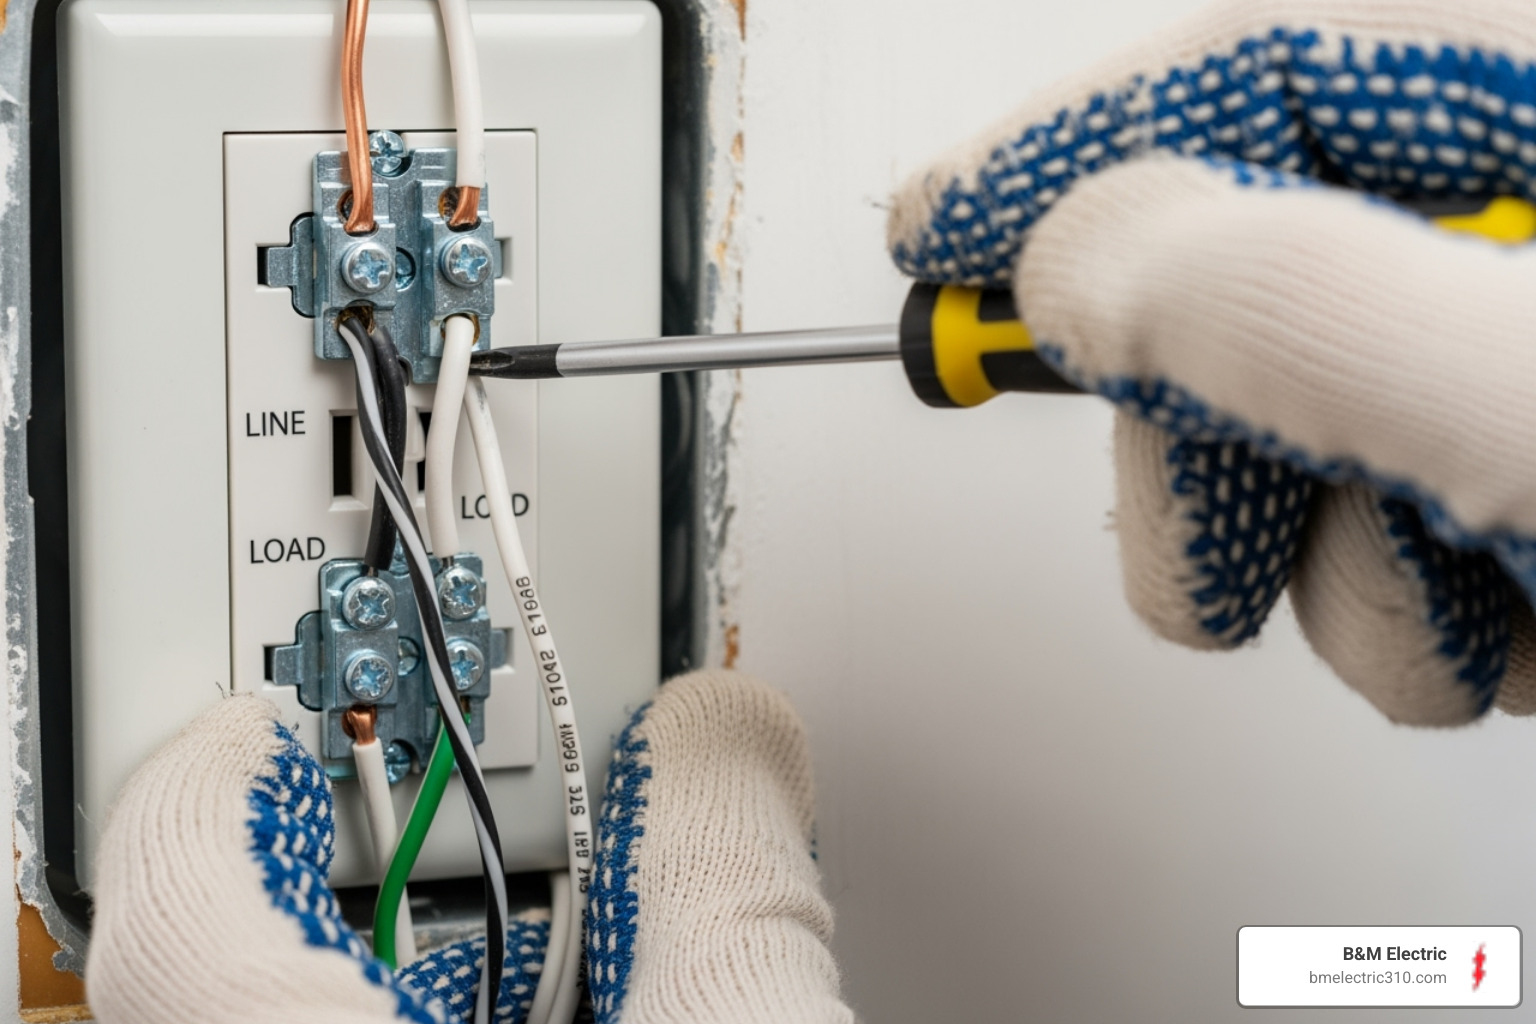
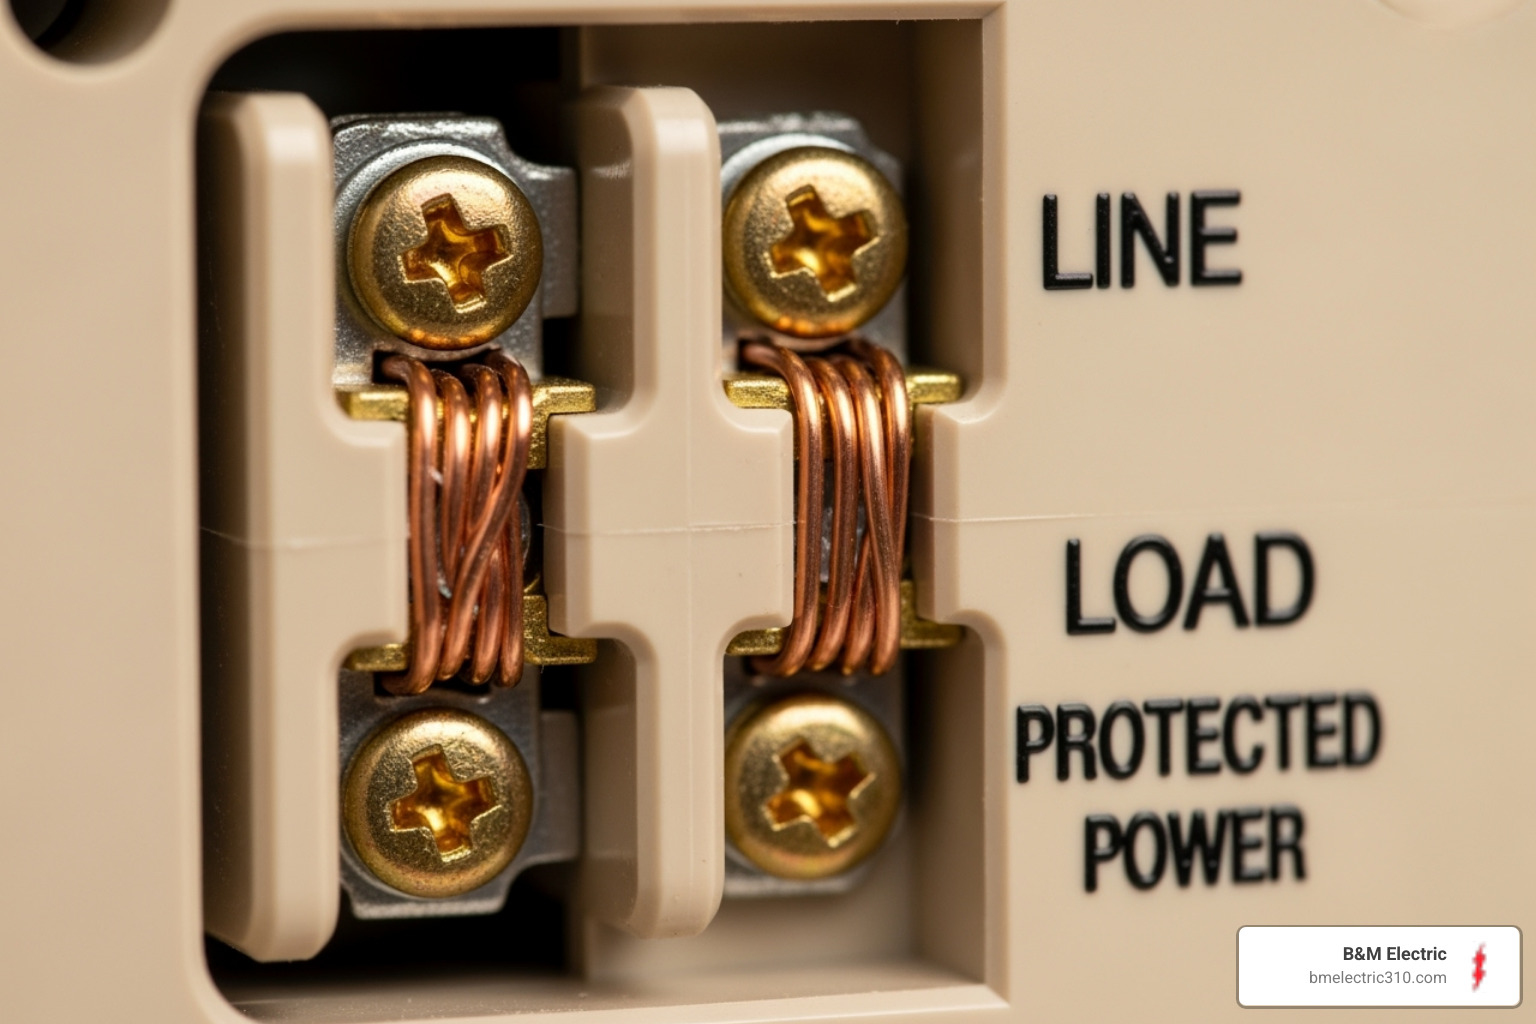
GFCI outlets have two sets of terminals: LINE and LOAD. Line wires bring power from the breaker. Load wires send protected power to other outlets downstream. If you see two sets of wires, you must identify the LINE set. To do this safely, separate all disconnected wires, briefly turn the breaker back on, and use your voltage tester to find the live (hot) wire. That pair is your LINE set. Immediately turn the breaker off again and label the LINE wires with electrical tape. If you only have one set of wires, you only have LINE wires.
Step 3: Wiring the New GFCI Outlet
Prepare wire ends by stripping about 3/4 inch of insulation and bending the copper into a hook with pliers.
First, connect the ground wire (green or bare copper) to the green screw. Next, connect the marked LINE wires: the black (hot) wire to the brass LINE screw and the white (neutral) wire to the silver LINE screw. If you have LOAD wires, connect them to the corresponding LOAD terminals. If not, leave the yellow tape over the LOAD terminals or cover them with electrical tape. Ensure all connections are snug.
Step 4: Securing and Testing Your Installation
Carefully fold the wires back into the electrical box. Mount the new outlet, attach the faceplate, and restore power at the breaker. To test, press the “RESET” button, plug in a lamp to confirm power, then press the “TEST” button. The lamp should turn off and the “RESET” button should pop out. Press “RESET” again to restore power. If this works, your installation is successful. For extra confirmation, use a dedicated outlet tester. Remember to test your GFCIs monthly and apply the included “GFCI PROTECTED” stickers to any downstream outlets.
Code Requirements and Common Mistakes
Understanding the National Electrical Code (NEC) is crucial for your home’s safety. The National Electrical Code requires GFCI protection in specific areas because they are known electrical danger zones. Compliance protects your family and is important for home inspections. Regular Electrical Inspections Safeguarding Home can help ensure your system is up to code.
Where the Electrical Code Requires GFCI Protection
The NEC requires GFCI protection in locations where moisture is present. Key areas include:
- Kitchens (especially near sinks)
- All bathroom outlets
- Laundry rooms and utility sinks
- Garages
- Unfinished basements and crawl spaces
- All outdoor receptacles
- Any outlet within six feet of a sink
For outdoor safety specifics, see our guide on Electrical Safety Tips for Outdoor Living Enjoying.
Common Mistakes to Avoid During a GFCI Outlet Install
Avoid these common pitfalls during a GFCI outlet install:
- Reversing Line and Load Wires: The most frequent error. It prevents the GFCI from working. Always identify and label your LINE wires.
- Loose Connections: Can cause overheating and fire hazards. Ensure all terminal screws are snug.
- Overtightening Screws: Can damage the outlet or strip the screw. Tighten until secure, then stop.
- Skipping the Test: Always perform the TEST/RESET sequence to confirm the outlet is protecting you.
- Using Indoor Outlets Outdoors: Outdoor locations require a Weather Resistant (WR) rated GFCI and a proper in-use cover.
- Cramming Wires: GFCIs are bulky. If the box is too small, it can damage wires. A larger box may be needed.
Troubleshooting Common GFCI Issues
If you encounter problems after your GFCI outlet install, try these steps:
- GFCI Won’t Reset: Check the circuit breaker. If it’s on, you may have reversed the line/load wires or there’s a ground fault. Unplug all devices from the GFCI and any downstream outlets, then try resetting. If it resets, one of the devices is faulty.
- Frequent Tripping: This usually means the GFCI is working correctly and detecting a problem. The issue is often a faulty appliance or moisture getting into the outlet.
- Dead Downstream Outlets: The GFCI has likely tripped. Reset it. If that doesn’t work, check the load wire connections at the GFCI.
If problems persist, the GFCI itself may be old (they last 7-10 years) and need replacement. For complex issues, our guide on GFCI Outlets That Keep Tripping can help.
Frequently Asked Questions about GFCI Installation
Here are answers to the most common questions we hear about GFCI outlet install projects.
Can I replace a 2-prong outlet with a GFCI?
Absolutely. This is a key safety upgrade for older homes lacking a ground wire. A GFCI provides shock protection by monitoring current flow, not by relying on a ground connection. The National Electrical Code permits this, provided you place the included “No Equipment Ground” sticker on the outlet plate. This allows you to safely use three-prong plugs.
What is the difference between the LINE and LOAD terminals?
This is the most critical concept for a successful GFCI outlet install.
- LINE terminals are for the incoming power wires from the circuit breaker. They are the power source.
- LOAD terminals are optional. They are used to extend GFCI protection to other standard outlets further down the circuit.
If you are only protecting the single outlet, you will only use the LINE terminals. Leave the tape on the LOAD terminals.
How often should I test my GFCI outlets?
You should test your GFCIs monthly. Press the “TEST” button; a connected device should lose power. Then press the “RESET” button to restore power. If the outlet fails this test, it no longer provides protection and must be replaced immediately. Make it a monthly habit, like on the first of the month.
When DIY Becomes a Job for the Pros
While a GFCI outlet install is a manageable DIY project for some, certain situations require a professional.
- Complex or Old Wiring: If you find a confusing tangle of wires, or old, brittle, frayed, or cloth-covered wiring, stop immediately. This includes aluminum wiring, common in homes from the mid-60s to mid-70s, which requires special handling.
- Circuit Overload Issues: If your breaker frequently trips, a GFCI won’t fix the root cause. An electrician may need to add a dedicated circuit.
- Persistent GFCI Tripping: If you’ve tried all troubleshooting steps and the outlet keeps tripping, there may be a deeper issue within your walls or electrical panel.
- Any Uncertainty: If you feel confused or unsafe at any point, trust your instincts. Electrical work is not the place for guesswork.
At B&M Electric, we bring 50 years of local expertise to every job in Torrance, CA, and the surrounding South Bay communities. Our team provides dependable service with a personal touch, ensuring every job is done with precision and care. When a simple project gets complicated, we’re here to help. For professional outlet and switch services in Torrance, contact our expert electricians. You can also learn more about our comprehensive Residential Electrician services. Let us take the shock out of electrical work!


